
Creating the Perfect Gallery Wall
Jan 16
Creating the perfect gallery wall is no easy fete. There are so many options, it can be extremely overwhelming to know where to begin. I broke down the endless possibilities into what I hope will be five helpful tips. And please know, I want you to succeed in creating a beautiful space in your home, that’s why I’m sharing this with you, but if it doesn’t work out or feels too exhausting, I offer gallery wall consults and I would love to help. You can sign-up for one here.
- Pick Frames You Love
Although the pictures in the frame will be what your eye is drawn to, you want to pick frames that match or compliment each other, but are also ones you love. You can generally pick frames based on your overall design of your home. Is your style more modern, bo-ho or industrial? You will want the gallery wall to ‘fit’ in the space. For example, if your home is farmhouse decor, then a bo-ho themed gallery wall can feel really out of place. - Black and White or Color?
After you choose which photos you’d like displayed on your gallery wall, you’ll want to decide if you’d like them printed in black and white, color or a combination of both. I would recommend starting this decision making process by looking at the colors in the photos you selected. Do they compliment each other or are they contrasting? Many people love the timeless look of black and white and it can truly transform photos into art.
If you can, print yourself some options and play around with just doing black and white or only colors or mix the two. If you need some printing options, check out my blog post Printing Your Photos. - Measure Your Space
I’m guessing if you have gotten this far into the gallery wall process, you likely already have the space for it. Now you’ll want to decide how much space to dedicate to this project. Painters tape can be a huge help for a this. You can measure things out and place the tape right where you anticipate the frames going. It’s always nice to see it before you start putting holes in the wall. - Choose Your Style
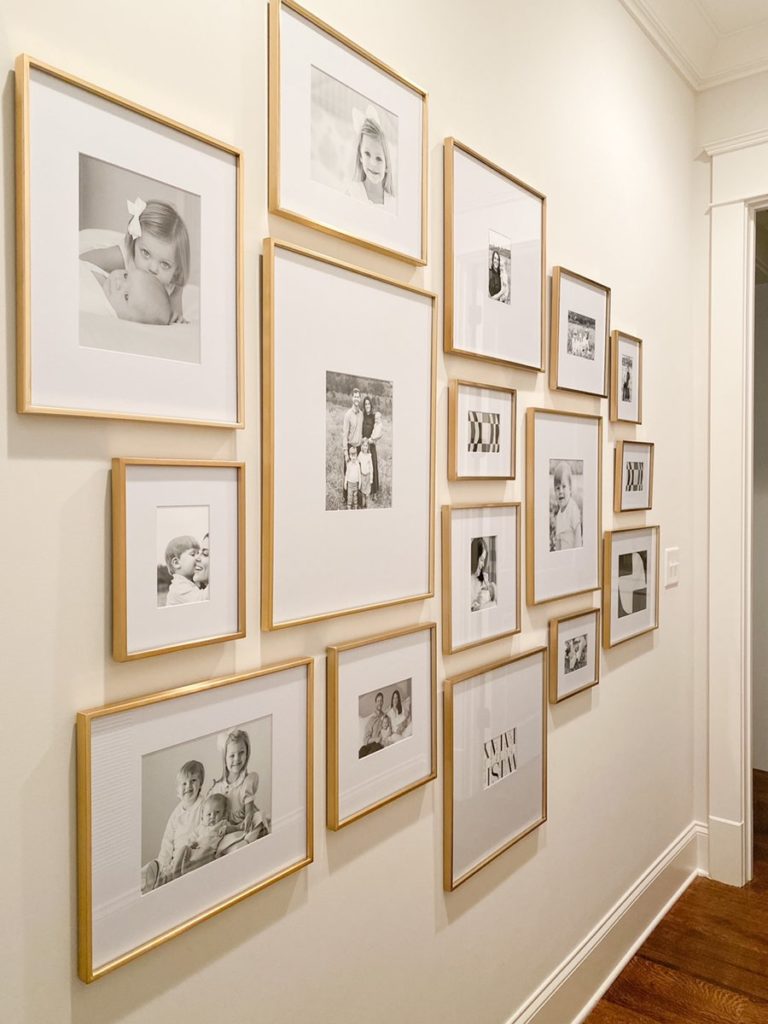
Pinterest will show you nearly endless options for how to layout your gallery wall. One thing most designers agree on is to keep the spacing between your photos or art evenly spaced. I prefer a more formal, but still playful look that would be categorized as a square or rectangle box. Using this layout, all four of the sides are perfectly straight lines, but the art within that design can be different shapes and sizes. Keeping the outside borders straight creates the look of a very intentional, but still lets you play with how the pieces are arranged within those edges. - Hire a Professional
I hope my tips make this task a little bit more manageable, but even so, I know this is a big and potentially overwhelming task. Again, I’m here to help. I would be honored to help you put together your gallery wall. You can schedule an appointment with me for a consult here.
Regardless of if you need my help putting the gallery wall together, I have a great install guy that can make sure all of your beautiful photos are hanging safely and securely.
Happy creating, friends!


Where are these frames pictured from?
hi rachel! these came from west elm awhile back! but are still some of my favorites!
Hello! Does West Elm still carry these frames?
hi paula! im honestly not sure, they had some sizes in stock last year! but you can look at pottery barn too. id just recommend finding a frame you can buy year to year so it can stay consistent!